

Quick Answer
Installing BMX grips involves removing the old grips, cleaning the handlebars, and sliding the new grips into place using compressed air, rubbing alcohol, hairspray, or grip glue depending on your preferred installation method. When installed correctly, BMX grips stay secure, provide better control, and improve riding comfort.
Installing BMX grips sounds like one of the simplest tasks in cycling maintenance - and it is, once the right method is understood. But riders who rush the process end up with grips that spin mid-session, slide off during tricks, or sit crooked on the bar in a way that throws off hand positioning entirely. Getting the installation right the first time takes less than ten minutes and makes a noticeable difference in how the bike feels to ride.
This guide covers every method for installing BMX grips - with air, without air, with grip glue, and without - plus how to remove old grips cleanly without damaging the handlebars underneath.
What You Need Before Starting
Gathering the right tools before starting prevents stopping mid-installation to hunt for something missing. The exact tools needed depend on which installation method is being used, but the following covers all scenarios.
New BMX Grips
Standard 22.2mm inner diameter for most BMX handlebars.
Isopropyl Alcohol
Cleans the handlebar surface before installation.
Clean Rag or Paper Towel
For wiping the handlebar before and after cleaning.
Compressed Air Optional
Fastest and cleanest installation method.
Hairspray or Grip Solvent Optional
Lubricates during installation and dries tacky.
BMX Grip Glue Optional
Creates a permanent, no-slip installation.
Flathead Screwdriver or Pick Tool
Helps remove old grips by creating a gap.
Lock-On Grip Hardware
Required only for lock-on grips. Most include the hex key.
Legend:
Step 1 - Remove the Old Grips
Before installing new grips, the old ones need to come off cleanly. Torn or pulled-off grips can leave adhesive residue or damage the bar end, which affects how the new grip seats.
Method A - Air removal (fastest)
Insert a thin flathead screwdriver or pick tool under the edge of the grip near the bar end to create a small gap. Spray compressed air into that gap. The air pressure inflates the grip slightly, breaking the seal between the grip and the bar, allowing the grip to slide off cleanly in seconds.
Method B - Water or solvent removal
Spray isopropyl alcohol or a small amount of water under the grip edge using a thin nozzle or straw attachment. Work the liquid around the grip by rotating it slightly, then slide the grip off. This method takes slightly longer but works well when compressed air is not available.
Method C - Cut off (last resort)
If the grip is completely worn, torn, or glued on permanently, cutting it off with a utility knife or scissors is the fastest option. Cut lengthwise along the grip carefully to avoid scoring the handlebar underneath, then peel the grip away.
After removal, clean the handlebar surface thoroughly with isopropyl alcohol and a clean rag. Any residue, dirt, or old adhesive left on the bar will prevent the new grip from seating properly and may cause spin later.
Step 2 - Choose the Installation Method
There are three main ways to install BMX grips, each with different trade-offs between ease of installation, grip security, and removability later.
Method 1 - Compressed air method (recommended for most riders)
This is the cleanest and most commonly used method for slip-on grip installation. Slide the grip partway onto the bar end, then insert a compressed air nozzle under the open end of the grip. A short burst of air inflates the grip slightly, making it slide smoothly along the bar to the desired position. Once the air releases, the grip contracts back around the bar and creates a tight, even seal.
The air method works best with standard rubber grips and leaves no residue. It also makes future removal and repositioning straightforward - the same air technique works in reverse to remove the grip later without damage.
Method 2 - Hairspray method (no air required)
Spray a light coat of hairspray on the inside of the grip and on the handlebar surface where the grip will sit. The hairspray acts as a lubricant during installation, allowing the grip to slide on easily. Once dry - usually within 10 to 15 minutes - the hairspray becomes tacky and bonds the grip lightly to the bar, preventing spin.
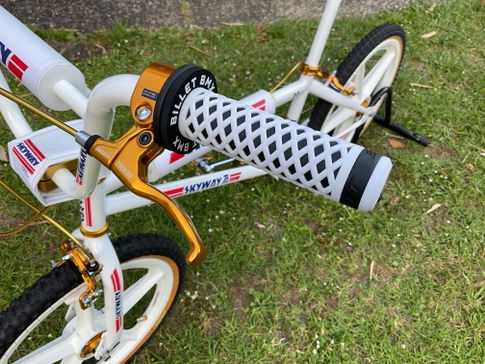
This method works well when compressed air is not available and produces a reliable result for most riding conditions. The bond is firm but not permanent, so grips can still be removed later with solvent if needed.
Method 3 - Grip glue method (permanent installation)
Apply a thin, even layer of BMX grip glue or contact cement to the inside of the grip and to the handlebar surface. Slide the grip into position immediately before the adhesive sets. Hold the grip firmly in place for 60 seconds, then allow the adhesive to cure for the time specified on the product - typically 30 minutes to 2 hours before riding.
Grip glue creates a permanent bond that eliminates any possibility of grip spin, which makes it the preferred method for riders who prioritize absolute grip security during hard street sessions. The trade-off is that future removal requires cutting the grip off or using a strong solvent that may affect the bar finish.
Step 3 - Install Lock-On Grips
Lock-on grips use a different installation process entirely. Instead of relying on friction or adhesive to hold the grip in place, lock-on grips use one or two alloy clamps with bolts that physically lock the grip to the handlebar.
Slide the lock-on grip onto the bar and position it at the desired location. Insert the clamp bolt using a hex key and tighten to the manufacturer's specified torque - typically 3 to 5 Nm. Do not overtighten, as excessive torque can crack the clamp or deform the grip body.
Lock-on grips eliminate grip spin entirely and are the most secure option for riders who do not want to deal with grip maintenance between sessions. The installation takes slightly longer than slip-on methods but requires no adhesive and makes future removal and reinstallation completely straightforward.
Step 4 - Check Alignment and Seat
Regardless of the installation method used, checking grip alignment before the adhesive cures or before riding is essential. The grip should sit flush with the bar end, with no gap between the grip end and the bar end cap or grip donut. The grip should also be straight - a twisted grip changes hand positioning and causes discomfort during longer sessions.
For slip-on grips installed with the air or hairspray method, allow the grip to fully seat and dry before riding. Riding too soon after installation while the grip is still mobile is the most common cause of grip spin developing within the first session.
Summary
Installing BMX grips correctly takes under ten minutes when the right method is matched to the right grip type. Slip-on grips install cleanly with compressed air or hairspray, lock-on grips need nothing but a hex key and correct torque, and grip glue provides a permanent solution for riders who want zero movement regardless of conditions. Billet BMX carries a full range of slip-on and lock-on grips across multiple compounds and patterns, so finding the right grip for the setup is the first step - installing it correctly is the second. Browse the full grip range at Billet BMX and build a cockpit that stays locked in every session.
Frequently Asked Questions
How do you install BMX grips without compressed air?
Spray hairspray lightly inside the grip and on the handlebar surface. The hairspray lubricates the grip during installation and dries tacky within 15 minutes, bonding the grip firmly to the bar without compressed air or grip glue needed.
Should BMX grips be glued on or slip-on?
Both methods work depending on riding style. Grip glue creates a permanent, spin-proof bond ideal for hard street riding. Slip-on grips installed with hairspray or air offer easier removal and repositioning, making them better for riders who change grips or setups frequently.
How do you remove BMX grips without destroying them?
Insert a thin flathead screwdriver under the grip edge to create a gap, then spray compressed air or isopropyl alcohol into that gap. The lubrication or air pressure breaks the seal between the grip and bar, allowing the grip to slide off cleanly without tearing.
Why do BMX grips keep spinning after installation?
Spinning grips are usually caused by insufficient adhesive, residue left on the bar before installation, or grips installed while the bar surface was wet or oily. Cleaning the bar thoroughly with isopropyl alcohol before installation and allowing adequate drying time solves the vast majority of spinning grip problems.
How tight should lock-on BMX grips be tightened?
Lock-on grip clamp bolts should be tightened to 3 to 5 Nm using a hex key - firm enough to prevent any rotation but not so tight that the clamp cracks or the grip body deforms. Always check the manufacturer's torque specification for the specific lock-on grip model being installed.


